
My Process – Intentioned Randomness
But, wait, you made this?
One of the most interesting aspects of making my birds is watching and listening to people when they see and touch them for the first time. They turn the bird from side to side. They almost always touch them in the same places. And, they almost always have a similar look on their face. Then they look up at me and ask, “You made this?”
It’s the highest form of compliment, though it took me a while to realize that. They’re intrigued by the idea that one artist has used so many different techniques in a single piece. Friends and family have laughed at themselves after asking that same question. After all, they’ve seen me making my birds and have supplied me with many of the materials I use to make them with.
It was my love of working with all of the different mediums and techniques that led to the creation of my birds in the first place. How, I wondered, could I incorporate crochet, sewing plush sculptures, embroidery, beadwork and color-work all into a single piece? And, what could I make that no one else is already making? It took more than a few years for all the pieces and parts to come together. I use techniques I’ve known since I was a child and more than a few new ones that I’ve had to invent myself.
What follows is a bit of a behind the scenes look at what goes into each of my birds. And, yes, I do make each and every bit of my birds.
Birth of a Bird
Most of my birds begin with a physical characteristic. Tall or short legs, slim or chubby, big or little beak. Sometimes, I have the entire silhouette in my head. Other times, I search the web for bird species with that initial characteristic.
Whether entirely from my imagination or with a little help from the birds of the world, every one of my bird sculptures begins with a basic sketch.
Using old magazine and catalog pages (turning art into even more art), I sketch a silhouette and use it to create a sewing pattern. I then cut out and hand-sew the pattern pieces together.
Intentioned Randomness – Sewing the Base
I prefer to hand sew the pieces together. That way I can create truly flat seams and begin defining the character of the bird. By design, I stitch the pieces a little off kilter – one of those happy accidents that turned into a proven technique. It gives each bird a bit of charm and sass – their own unique personality from the inside out.
Once I’m done sewing the base form, the pattern gets thrown away. The paper they’re drawn on might be recycled, but, each pattern is used only once.
The Legs & Internal Armature
The legs and internal armature were the most difficult to design. I wanted my birds to be able to withstand a tumble to the floor or simply being put down roughly on a table. Of course, I hope they will be treated kindly. But, I wanted them to withstand a small amount of misfortune.
When I found out that the patterns on the ‘skin’ on the legs and feet of birds found in nature are unique – not just to that species, but to that individual bird, I knew I had to recreate that random patterning. And, I came to learn that it wasn’t some sort of wrinkled and creased skin at all, but, actually scales. What better way to create random ‘wrinkles’ than with messy wire wrap?
I actually consulted with an engineer and a welder/metallurgist along with other artists. Problem was most of their suggestions would have required investing in expensive equipment, the use of chemicals requiring more ventilation than I could provide, eliminating the tiny claws, or even foregoing the legs entirely.
After twisting, bending, hammering and wrestling what seems like miles of different sizes and types of wire, I came up with the process I now use to make my bird legs and armatures. I use 6 types of wire on each bird to create the armature, legs and toes but only 2 are visible. The armature shown here is for a bird with a more centered center of gravity. Taller and more elongated birds have an even more complex armature. Someone determined to bend the legs could certainly do so, but, with respectful handling and hopefully not too many tumbles onto the floor or unfortunate encounters with small children or pets they are quite tough.
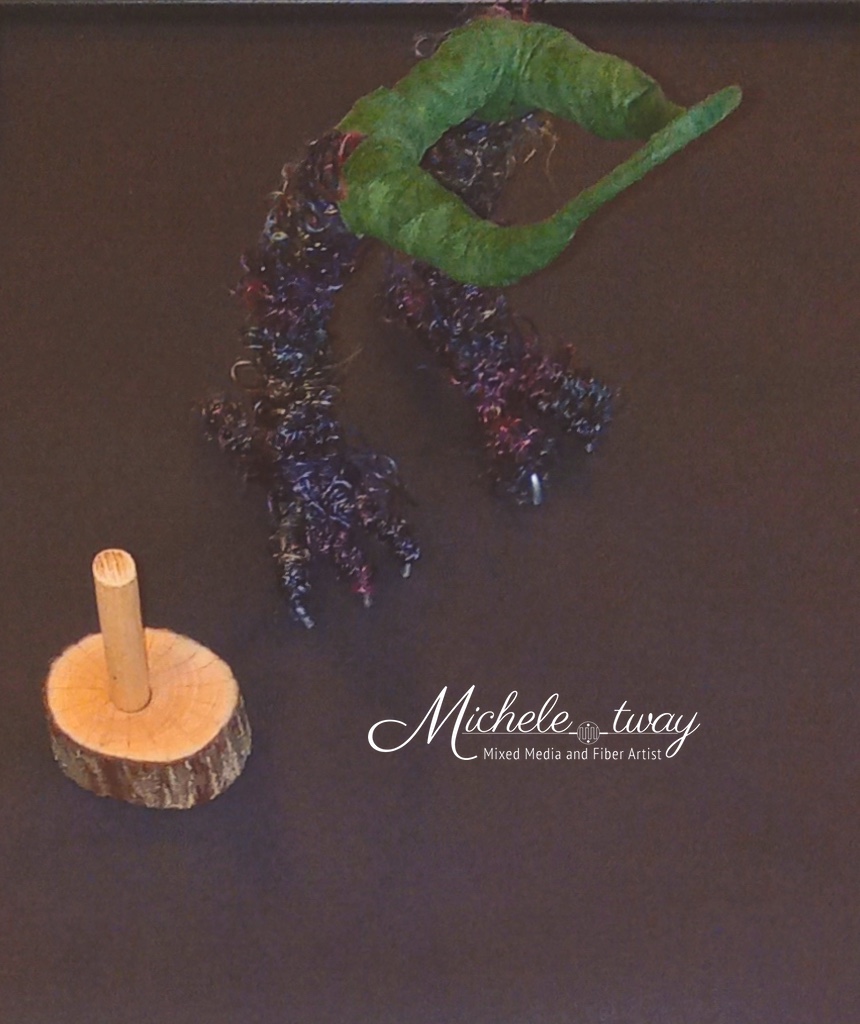
Some birds will have a bit of novelty yarn wrapped with the wire, like the example shown here; others are made exclusively from wire.
My mounted birds contain a simple block and peg system like that shown in this picture.
The Beaks
Each beak is custom sewn to compliment the bird it’s going on. I create a sewing pattern to make some beaks but, most of the time, I don’t use a pattern; I just cut and shape the fabric as I go.
I don’t have a one-sized-fits all approach to decorating the beaks other than they all feature long and short embroidery stitches. Some have a bit of machine embroidery to create a base coat, others have some needle felted roving as a base. A few, like Oliver here, are 100% hand-embroidered and have taken several days to make. And others are made from fabric that I’ve dyed with alcohol ink and decorated with a combination of machine and hand sewing. Every beak is sewn with cotton embroidery floss. Most have a variety of cotton and synthetic sewing threads. And, some also have metallic threads.
Random Collection of Yarns & Fibers
With every bird, I try to use as many different yarns from as many different sources as I can. I generally start with at least 12 different yarns on the body but often use over 20 on a single bird. With the beaks I’m generally using 5-10 different embroidery threads and yarns.
All of my birds are made with natural and synthetic yarns. Some may have silk or metallic threads but all have one or more forms of wool (lambswool, merino, Persian, cashmere, angora and/or alpaca). Many of the yarns are from independent dyers and sold in small batches. Koko, my first owl, even has a bit of coarse Navajo-Churro wool rug yarn.
I’ve used re-homed impulse buys, weaving thrums, Persian embroidery wool, and even a single one yard piece of merino sock yarn left over from a friend’s knitted socks. Friends, family and other artisans continually share with me those small amounts of yarn that are too nice to waste but are often not enough for their own projects.
I incorporate new yarns with their oh-so-colorful and delightfully random bits and pieces.
Random bits and pieces, in limited quantities, ensures each bird is truly unique. But, it is also reminiscent of the community spirit once found in charm quilts similarly made by gathering materials from a variety of sources. In a very tangible way, the support of my friends, family and other artists is stitched into every bird I make.

The Eyes
Other than ruby-throated hummingbirds and a few other notable exceptions, the only shiny spots on birds are their eyes.
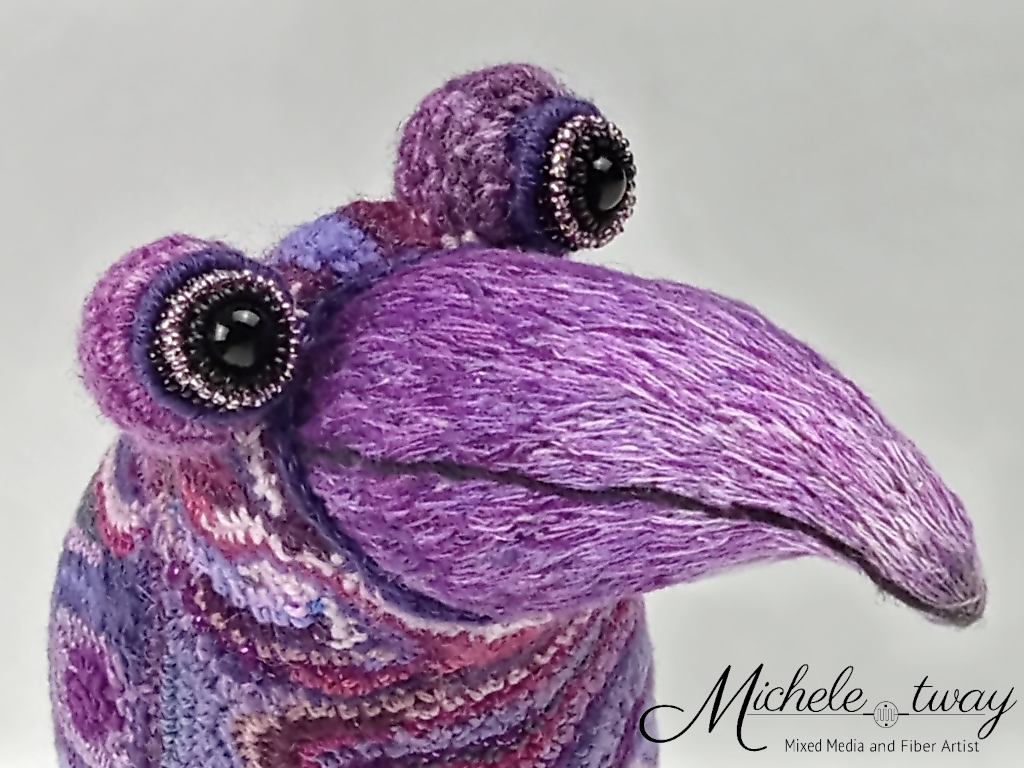
Oh, how their eyes sparkle and shine in the sun. They appear somewhat hard and cold amongst their feathers. And, yet, they seem to absolutely resonate with life. Glass and crystal were the obvious choice for raw materials. But, they had to be different from bird to bird. And, they were my final opportunity to capture the charm and personality of each of my birds.
The eyes are the last thing that I make on each bird. I’ve found that I absolutely cannot make them until the rest of the bird is finished. Here’s sweet Matilda with her pretty eyes – a vintage button surrounded by 4 different kinds of beads.
At any given time, I probably have 4 or 5 eye-less birds on my work table. It seems like I have to wait for them to tell me what they want. The color, the size or if they should be subtle or dramatic. Some tell me almost immediately how their eyes should look. Others don’t tell me for weeks or even months. I guess it’s only fair they get to decide that. After all, up to that point, I had made all of the decisions as to how they should look.
Mounted Birds
I began making mounted birds in 2022. They’re mounted on pieces of Mountain Laurel, Rhododendron and Cedar. The wood is sustainably harvested from nearby Columbus, NC.
My mounted birds contain a wooden support within their bodies where a small wooden peg can be inserted. The bird, with the peg inserted, can then be secured to the base.
Each of my mounted birds can be separated from their bases for shipping or travel. Other than the woodpeckers which are mounted vertically; each can stand, unaided, when not on the base.
What’s in a name?
I try to give each of my birds a name that befits their personality. Sometimes that could relate to their coloring – Maxfield is named for the artist Maxfield Parrish, who is remembered for his wonderful use of color and the blue named for him; Parrish Blue. Others may have a more direct connection with their colors like Juniper.
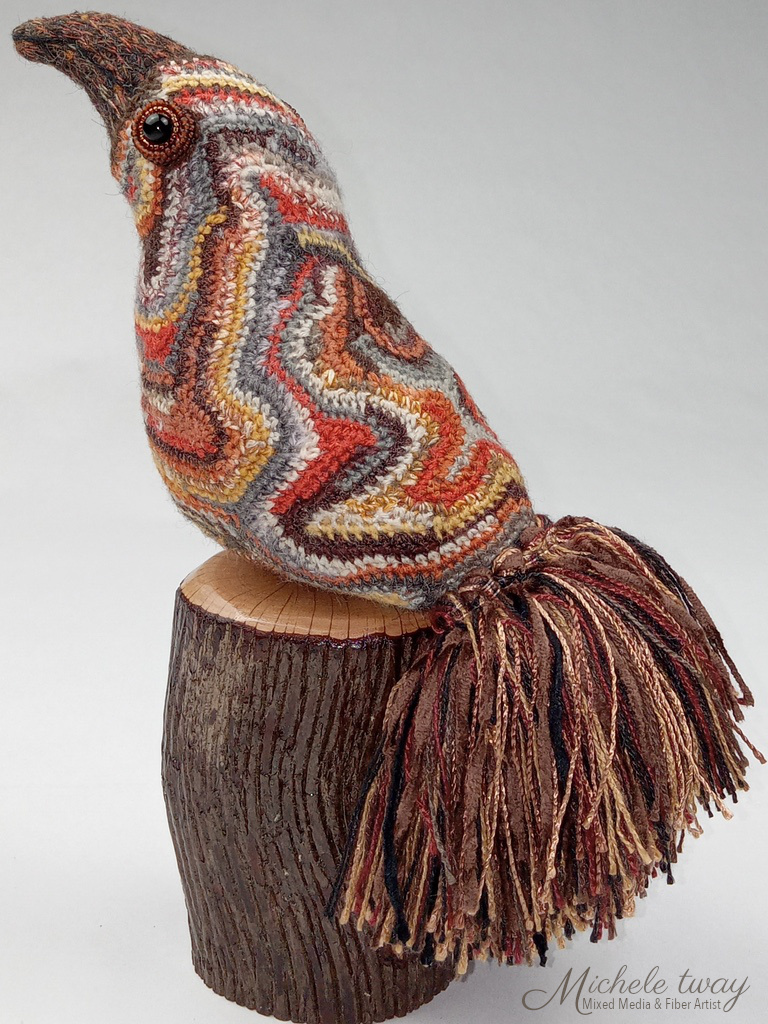
Some names are befitting their overall look or personality. What other name could my first dancing bird have other than waltzing Matilda? As soon as I put his little beret upon his head – Maurice was instantly named. Sometimes, like with these two, the search for the perfect name is easy. Though some of my flock have actually told me their names – yes, I am one of those artists. Sweet Millicent, shown above on her wooden perch, is one of those birds who let me know what they wished to be called. Other times, it can literally take hours to find the perfect name.